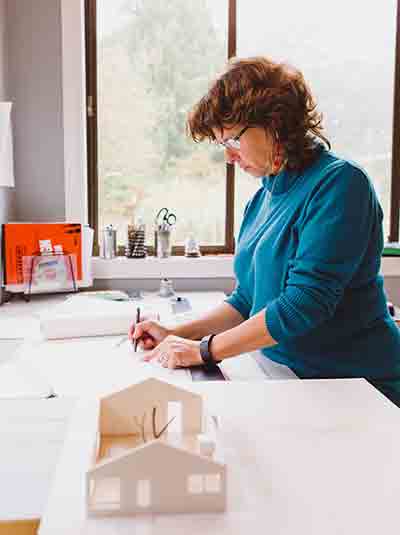
 Our first meeting is free and is meant for me to listen to your thoughts and for us to get to know each other a little. We’ll talk about what kind of help you are looking for and what the next step in the process will be.
After our first meeting I will work to come up with suggestions on how to solve your specific situation. Often I will come up with a couple of different ways to go and we’ll use the sketches to discuss and develop the project.
Having these sketches will help you ponder your options and make sure that you choose the right design before you begin building. I always say, it’s much cheaper to try out ideas and make mistakes on paper than it is on the construction site. (This will save you a lot of expense and grief during the building process.) You most likely will be living in your home for many years to come, so let’s make sure you end up with a home you love. Planning it well is time and money well spent.
When we have sketches of the final solution, be it a new structure or remodeling of a current one, it’s time to make drawings for the building permit application, work drawings for the builder, or just a more detailed drawing for you if you are doing the job yourself.
See the ReThink design process in action with Before & After projects.
an example of the rethink design process
Here is an example of four different solutions to the same set of problems, each having different qualities.
By going through each one of them, the client gets to try out the different scenarios and then choose which one is best for that particular person or family. Sometimes a combination of the different options ends up being the right one.
existing floorplan
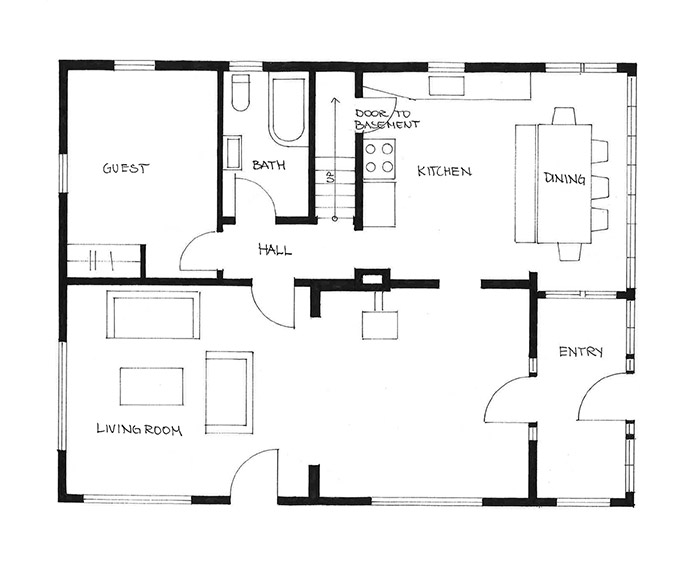
These were the main problems with this house:
- Very little work area/counter space in the kitchen. Counter partly cut off because of the door down to the basement
- The room you come into from the entry is big but ends up not being used much. Too much traffic and no place to settle down.
- The entrance is a nice big room but has no closet for hanging coats.
option A
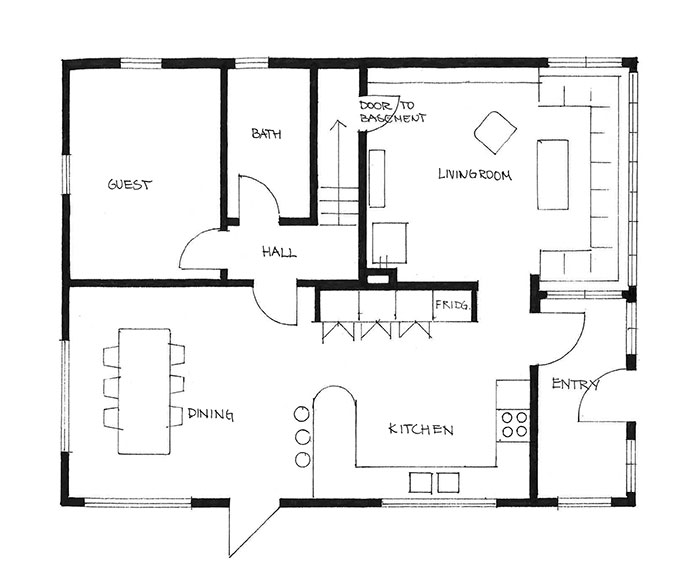
- By changing the location of the entry-to-kitchen door and moving the oven, we get a big kitchen where the unused room used to be
- By closing the door between the kitchen and the hall we make room for the oven and create a cozy living room where the kitchen used to be.
- Guest room and bath are left as is.
option B
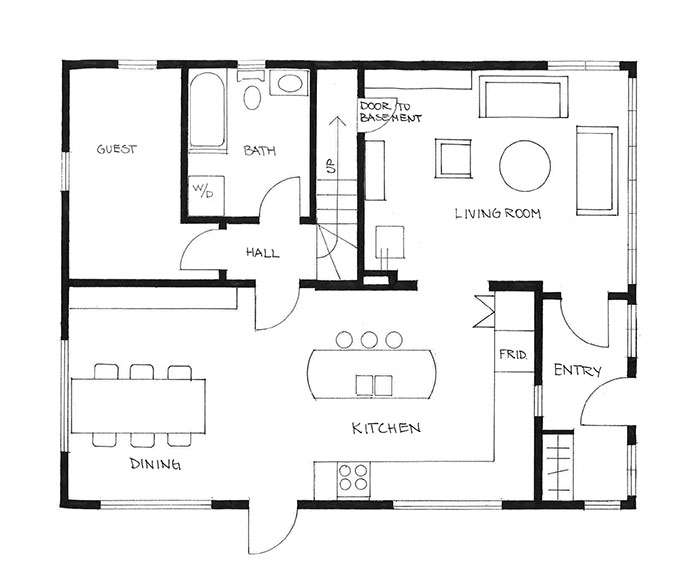
- Here we move the door so that you enter into the living room and we give the kitchen more counter space than in solution A.
- Replacing one window with a smaller one in the entry makes room for a proper wardrobe.
- The island routes the traffic away from the working area in the kitchen.
- The bathroom is bigger and has room for a washer/dryer.
option C
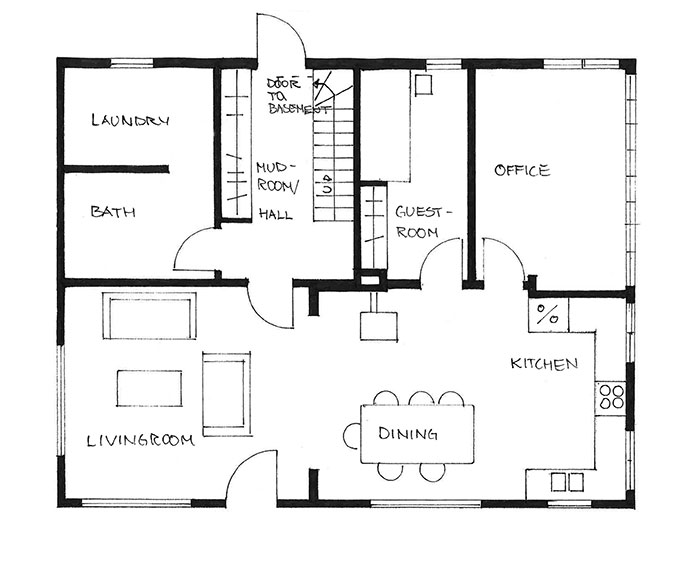
- The entrance and hall/mudroom is moved to the back of the house, leaving the sunny front of the house available for the living room, dining area and kitchen.
- The hall gets a big wardrobe/closet.
- We move the guestroom and get a proper laundry room in addition to a bath and a home office with lots of light.
option D
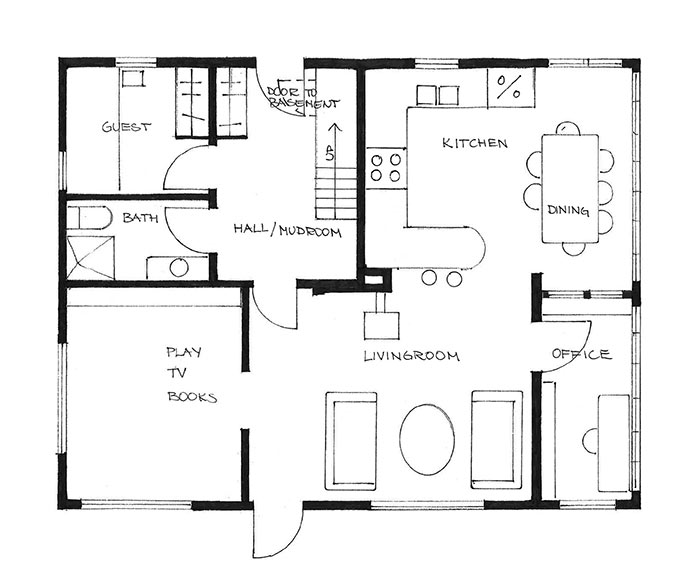
- The kitchen is kept in the back of the house.
- The entry/hall to the house is moved to the back of the house.
- By entering the basement stairs from the hall instead of from the kitchen we make room for lots of counter space in the kitchen.
- The existing mudroom is made into an office.
- A playroom/TV room is separated from the living room.
- Opening up between the kitchen and living room increases the connection between the two rooms.